


Set Order of Custom Fields
This article provides steps to set the order of custom fields.
You can set the order in which custom fields appear on the Custom Fields page. The custom fields you have created appear in the order you set wherever they are displayed in the system (e.g., on the Additional Info card for Families and Members) or on registration forms.
Complete the following steps to set the order of custom fields:
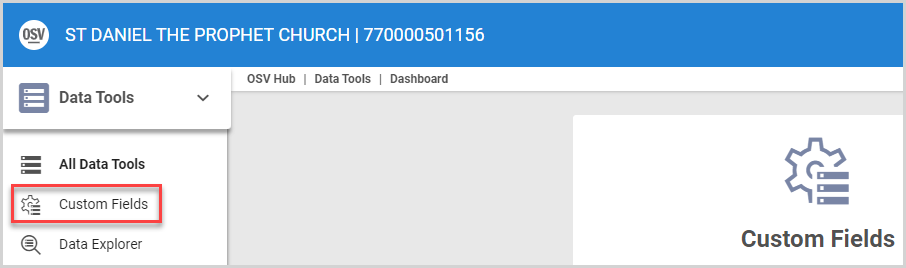
1. In Data Tools, select Custom Fields in the main menu.
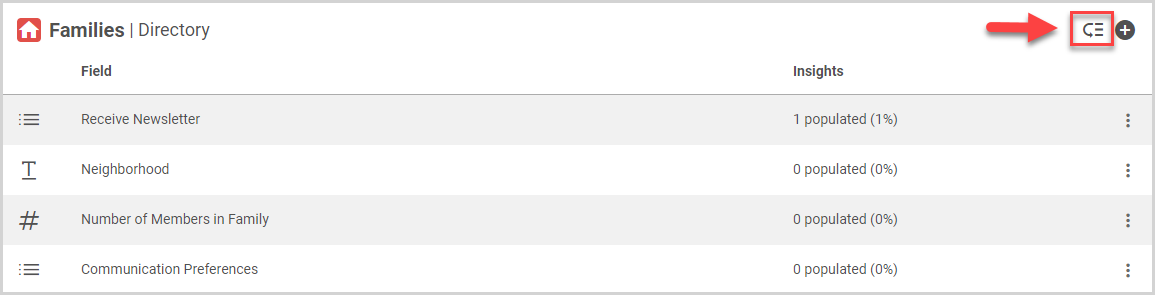
2. Select the Directory or Religious Ed tab as appropriate.

3. On the Custom Fields card, click the Reorder icon.
4. Drag and drop the custom field(s) into the order you desire.

5. Click the Save Order button.

Note* The video is best viewed at full screen. Press Esc on your keyboard when you are finished viewing.