


Family List Report
This article provides information about and steps to run the family list report.
The Family List report allows you to obtain a wide range of information from the system about your families in Directory, including contribution information if you have appropriate system permissions. The report results list families that match the filter criteria you set.
There are a variety of filters available to help you find the specific information you need, and the flexible interface allows you to show and hide the filters you want to use. The system remembers and saves your filter criteria settings each time you run the report, but you can update the filters at any time. You can download the results as a pdf, csv, or excel file. Family custom fields information is included in the report, but it is displayed only in the CSV download.
Complete the following steps to run a Family List report:
Locate the Family List Report
1. In Directory, select Reporting in the main menu.

2. On the Select Report Type card, select Family List in the drop-down menu.

Configure the Report
The following selections provide details on configuring the report and displaying or downloading the results. The report returns results listing the families that match the filter criteria you set.
Add and Remove Filters
There is a range of filters available for the Family List report, so you can find the precise information you need. You can add or remove filters to the report anytime as needed:
1. Click the gear icon to view the Report Filters side sheet.

2. On the Report Filters side sheet, select the filters you want to use in the report:
To add a filter to the report, click the filter toggle. The filter option appears on the report configuration card.

Note* the system remembers and saves your filter selections for the next time you run the report. You can update the selected filters at any time.
To remove a filter from the report, click an activated filter toggle. The filter is removed from the report configuration card.

Note* If you remove a filter and then later add the filter back to the report, the filter returns to its default setting, and any selections you made for the filter must be set again.
3. When you have selected all the filters you need, click the Close button to return to the report.

Set Filters
Once you have selected the filters you want to use, set the range / values for each filter:
1. Click the drop-down arrow or filter icon.
2. Select the filter criteria.

Date Filters
The available date filters allow you to define a date or date range to apply to your results. The family list report has three date filters available, which can be used separately or in combination:
- Registration Date
- Date Added
- Contribution Date (only available with appropriate system permissions)
To set the filter, click the drop-down arrow and select the date criteria, using the calendar as needed.

There are a number of settings available for each date filter:
-
All Dates - does not apply specific dates to your results
-
On Date - returns results only for the specific date you select
-
Between - returns results for a custom date range
1. Select the start date.
2. Select the end date. The dates highlighted (including the start and end dates) are included in the range.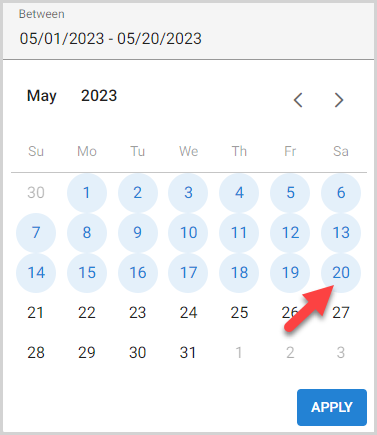
3. Click the Apply button.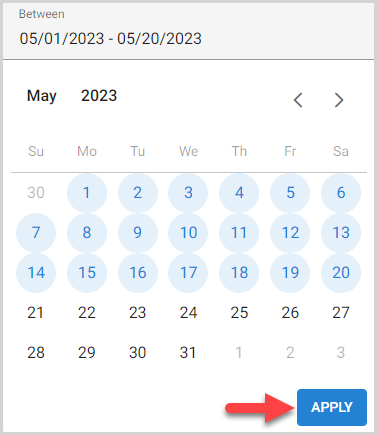
-
Before - returns results for before and including the date you select
-
After - returns results for after and including the date you select
-
Last 7 Days - returns results for the previous 7 days, up to and including the current date
-
Last 30 Days - returns results for the previous 30 days, up to and including the current date
-
Last Month - returns results for the previous calendar month
-
Last Year - returns results for the previous calendar year
-
This Year - returns results from Jan. 1 to the current date of the current year
Note* When using the calendar to select dates, you can manually type in the dates you need, which is especially useful for selecting dates in the far past.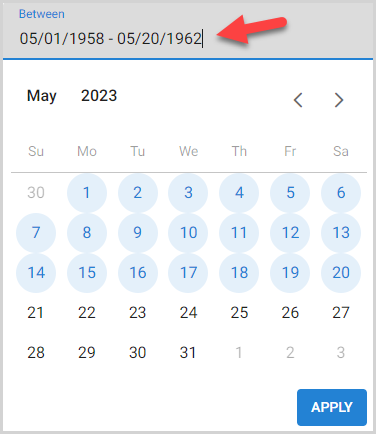
Tag Filters
You can set filters to include and/or exclude family tags:
- When tags are included in the filter criteria, families that have all the selected tags applied to their family entry are included in the results.
- When tags are excluded in the filter criteria, families that have any of the selected tags applied to their family entry are excluded from the results.
- When tags are both included and excluded in the filter criteria, only families matching both the included tags criteria and excluded tags criteria are listed in the results
Note* Families that meet your tags criteria are listed in the report results. However, the specific tags information for each family is only available in the CSV download, not in the other file download formats or on the results page.
Notes Filters
You can filter results to only include families that have public notes associated with their family entry and choose whether to include those notes in the results export. Select the checkbox for the notes filters you wish to include.

Note* Families that meet your notes criteria are listed in the report results. However, the specific notes for each family are only available in the CSV download, not in the other file download formats or on the results page.
Contribution Filters
Users with appropriate permissions can include and filter the report by family contribution data. Contribution data, the Include Contributions filters, and the Contribution Status filter are only displayed in the system for users with permissions to view contribution data. When you select contribution filters, the report results return families that match the contribution filters (and any other filters) you have selected.
You can use the filters to help you find families that match your contribution criteria. For example, to find all families that have contributed at least $1,000 to the School Fund this year, you can set the contribution date range for this year, select School Fund as the fund filter, and set the Total Contribution Minimum to $1,000.
Contribution Status
The Contribution Status filter can be used with or without the Include Contributions filters. To set the Contribution Status filter, select a contribution status in the drop-down menu.

Include Contributions
Selecting the Include Contributions checkbox enables a range of filters related to contribution data. The report results return families that match the contribution filters (and any other filters) you have selected. When the Include Contributions checkbox is selected, family contribution amount and number of contributions are displayed on the report results and downloads (whether or not any other contribution filters are selected).
1. Select the Include Contributions checkbox.

2. Click the gear icon to view the report filters side sheet.

3. Select the contribution data filters you wish to use.

4. Click the Close button.

5. Set the selected filters for contributions.

Select Name Style
You can set the report to use the Family, Formal, or Informal name style in the report results and downloads. Select the Name Style option you want.

Select Sorting Option
You can sort the results by a variety of fields. Select the option by which you want to sort the results.

Family List Report Results
Once your filters have been selected and set, click the Run Report button.

The results list families that match all your filter criteria.

You can view the print preview format of the report by selecting the print preview icon.

The report results list the applicable date range for the report in the subheading, with the following conditions:
- The report reads “All Dates” if the only date filter(s) selected is set to All Dates or if no date filter is selected.

- If one date filter is selected and set to anything other than All Dates, the report gives the name of the date filter and the applicable dates.

- If more than one date filter is selected and set to anything other than All Dates, no subheading appears.

Reconfigure the Report
You can reconfigure and rerun the Family List report with new criteria as needed:
1. To add or remove filters, click the gear icon and then select / remove filters in the side sheet.

2. Update filter, style, and sort settings in the Reconfigure Report card as needed.

3. Click the Update Report icon.

Download the Report
Downloading the Family List report allows you to print the report, save it to your computer, or otherwise use the it. To download the Family List report, click the download icon, and then select the format type.

Three file types are available for export:
-
Acrobat (PDF) file - A printable format of the report. The PDF file includes the same information given in the report.
-
CSV (comma delimited) - Comma Separated Values file format.
Note* Families that meet your Tags / Notes criteria are listed in the report results. However, the specific tags / notes for each family are only available in the CSV download, not in the other file download formats or on the results page.
- Excel Worksheet - exports the same information in the report as an editable Excel worksheet.
Note* The video is best viewed at full screen. Press Esc on your keyboard when you are finished viewing.