


Accounts Import for Invitations
This article provides information on the file import process to import accounts and invite donors to begin using Online Giving.
With Online Giving enabled, staff can import donors by uploading a .csv file of all their accounts. This sends an invitation email to donors to set up their accounts.
Here are the steps:
Prepare the File Template for Import
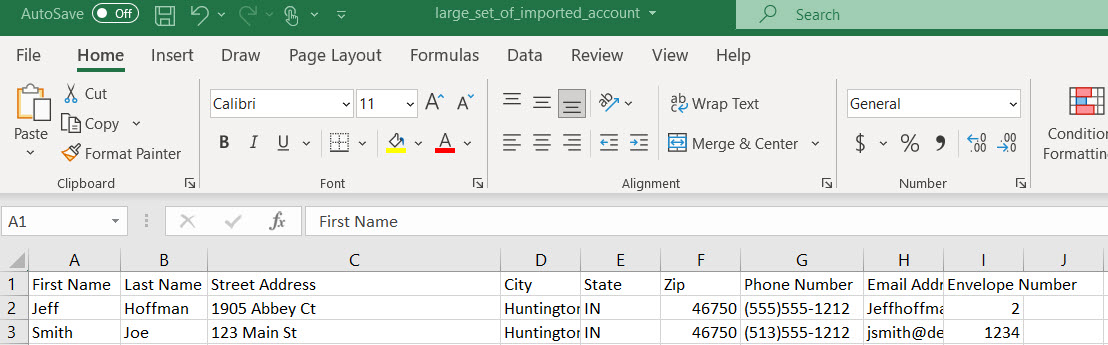
Here is a list of field headers available within the import file. All headers must be listed in the file, even if not all are populated with data.
Data is required for First and Last Name and email addresses for the import to be successful.
- First Name-Requires data
- Last Name-Requires data
- Street Address
- City
- State
- Zip (Enter Zip, not the words Zip Code)
- Phone Number
- Email Address-Requires data
- Envelope Number-this will be assigned to the donor when they create their account.
Template:
Template_large_set_of_imported_account.csv
Example:
To Import the File
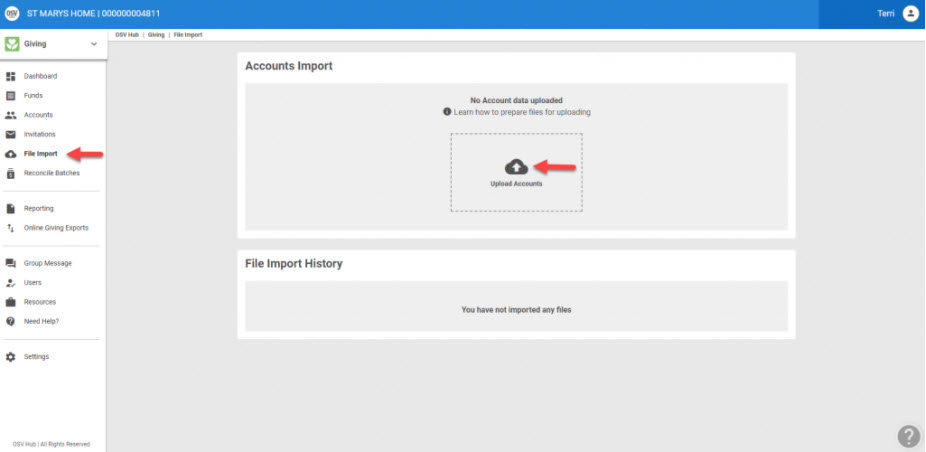
1. From Giving go to File Import.
2. Click on Upload Accounts.
Note* If an organization has both Online Giving and Church Manager the Contribution Import card is also viewable. This organization in the example only has Online Giving so only the Accounts card is viewable.
3. Select the .csv file of donor’s names and their email addresses to be imported. This action will send an invitation email to donors to set up their accounts.
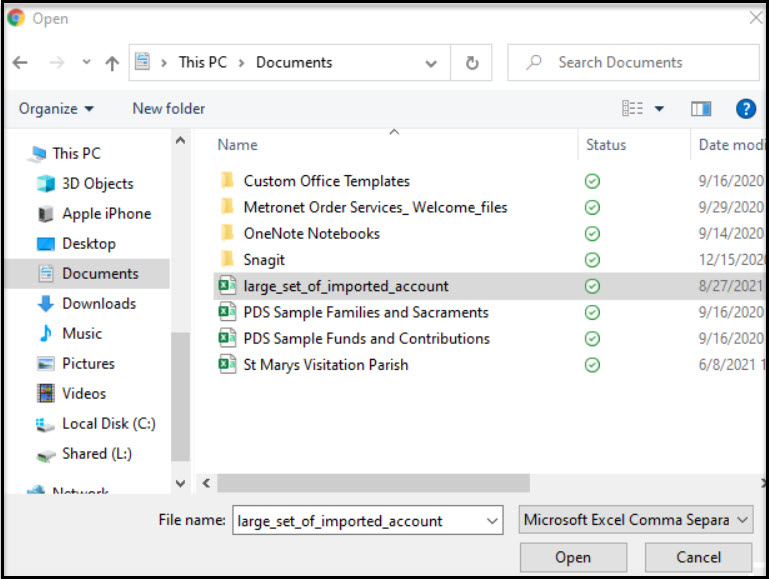
4. Click on Open.
5. Click on Import File. (ust be a csv file.)
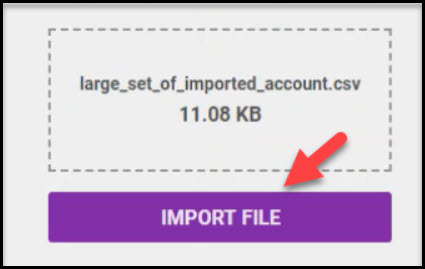
6. Results of the import populate.
The account file is uploaded, exceptions noted, and information about how many accounts were imported, skipped and if there were any errors are displayed on a summary after the import.
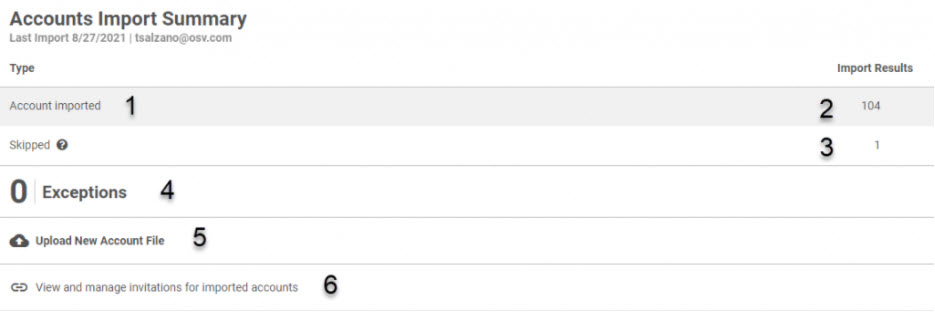
The Accounts Import Summary always includes the last import date and organization email. It also provides the following information:
1. Type-Account Imported or Self Managed Accounts.
2. Import results-The Number of accounts imported.
3. Skipped-Number of accounts in the file that were skipped because they have been previously recorded.
4. Exceptions
5. An upload icon– Provides an opportunity to Upload a New Account File. (This will be the place to upload any subsequent account files.)
6. A link -Provides an opportunity to click on the link to go directly to the Invitations screen to view and manage invitations for imported accounts.
The import transaction can be viewed on the File Import History.

Click here for more information about invitations.
Note* Visual steps are best viewed at full screen. Click Esc on your keyboard when you are finished viewing.