


Create a Custom Field for a Religious Education Term
This article provides steps to create a Custom Field for registrations in Religious Education.
Unique fields can be added to specific registrations in Religious Education to collect data so you can gather information specific to your organizational needs. A Religious Education administrator can add a Custom Field to a term. A Custom Field can be viewed and edited after it has been created. Editing the Custom Field updates the information that the Custom Field collects. Custom Fields can also be deleted. However, once fields have been populated through registrations, you are not able to delete them.
The Custom Fields are shown on the public Religious Education registration form for every student being registered for the term.
Check out these links for more information on viewing Custom Field Activity or editing a Custom Field, as well as deleting or setting the order of a Custom Field. Check out this link for a Religious Education Custom Fields Overview.
Complete the following steps to create a Custom Field for a registration in Religious Education:
1. In Data Tools, go to Custom Fields in the main menu.
2. Select View Custom Fields.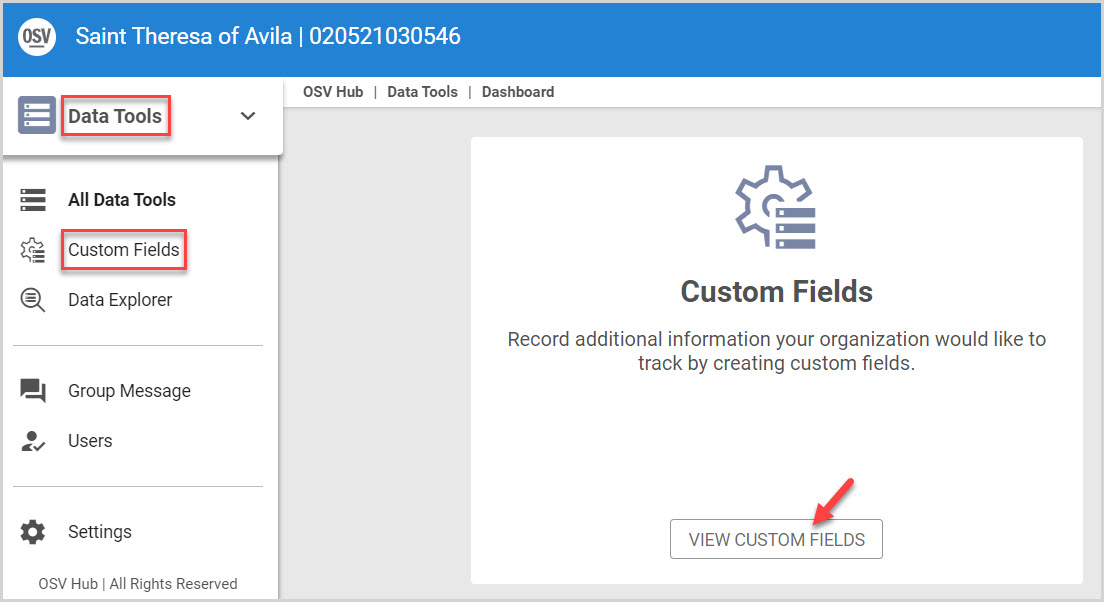
3. Click on the Religious Education tab.
4. On the Custom Fields page, click on the Add Custom Field icon (plus sign icon) on the Registrations card.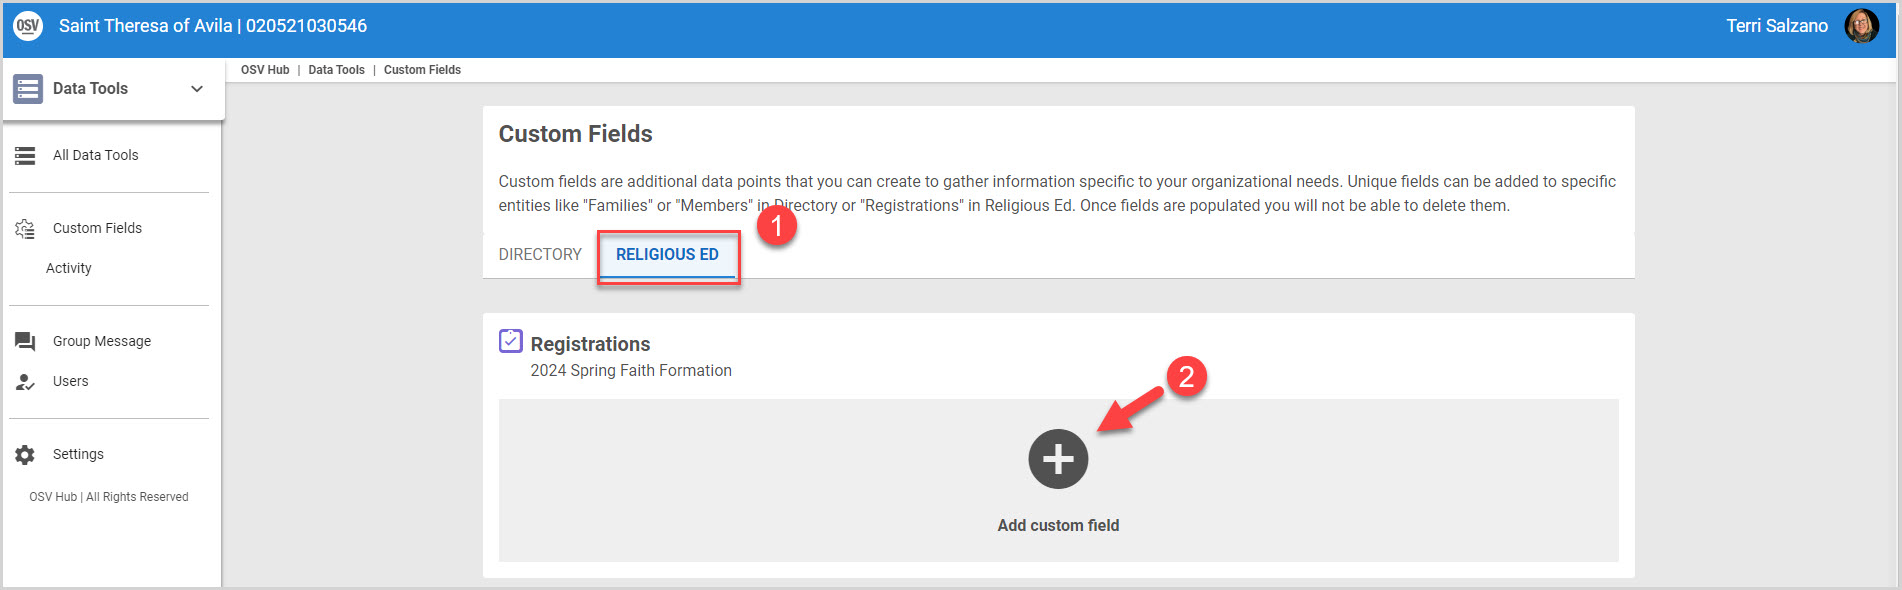
View the steps.
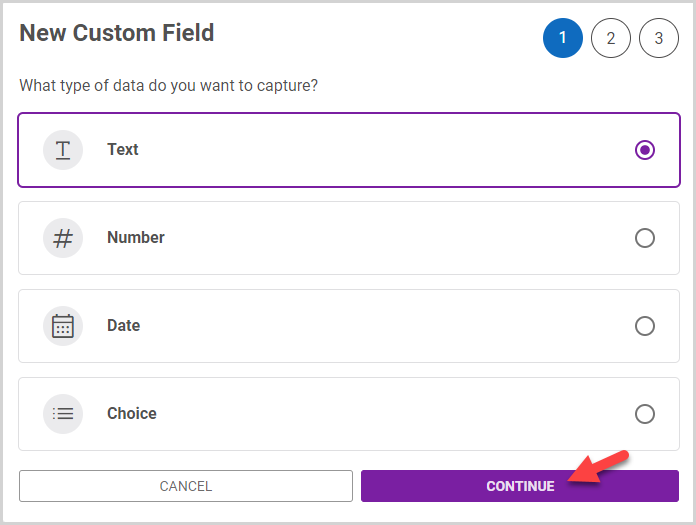
5. On the New Custom Field card, select the type of data you would like to capture. (Text, Number, Date, or Choice.)
6. Click Continue.
Note* There are specific instructions for each Custom Field type (Text, Number, Date, and Choice) in the following sections. Click on the Custom Field type drop-down menu to open and view directions for each one.
Text
1. Select Text on the New Custom Field card.
2. Click on Continue.
3. Enter a custom label in the text Field Label.
The custom text field is created in the Religious Education module and associated with registration data for the designated term. This information will be shown on the public Religious Education registration form for every student being registered for the term. Examples: How many siblings are there? Are there any food allergies? etc.
4. Enter help text. This is optional. If you enter help text, the tooltip containing the information will be viewable on the registration form to help guide users when completing the Custom Field questions.
5. Click Continue.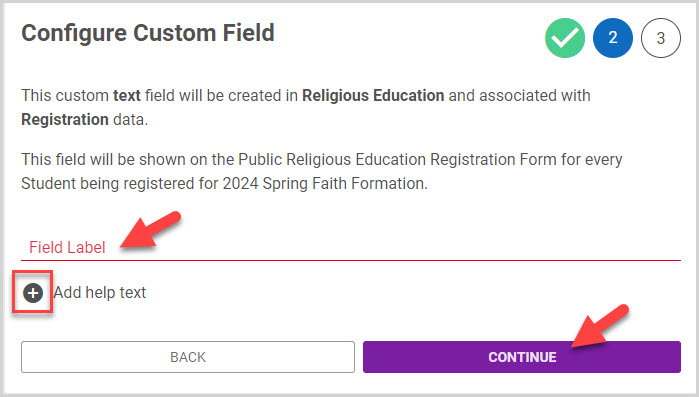
6. Review the configuration to ensure its accuracy. (Do not edit text here. Any text entered while on the preview screen does not save or show up anywhere in the system.)
Note* A tooltip displays if you entered help text. You can hover over the the tooltip to view the text.
Note* Click Cancel to discontinue.
7. Click Finish to create the Custom Field.
Note* The new Custom Field you create is viewable listed on the specific Registration card on the Custom Fields page within the Custom Fields Religious Education tab. 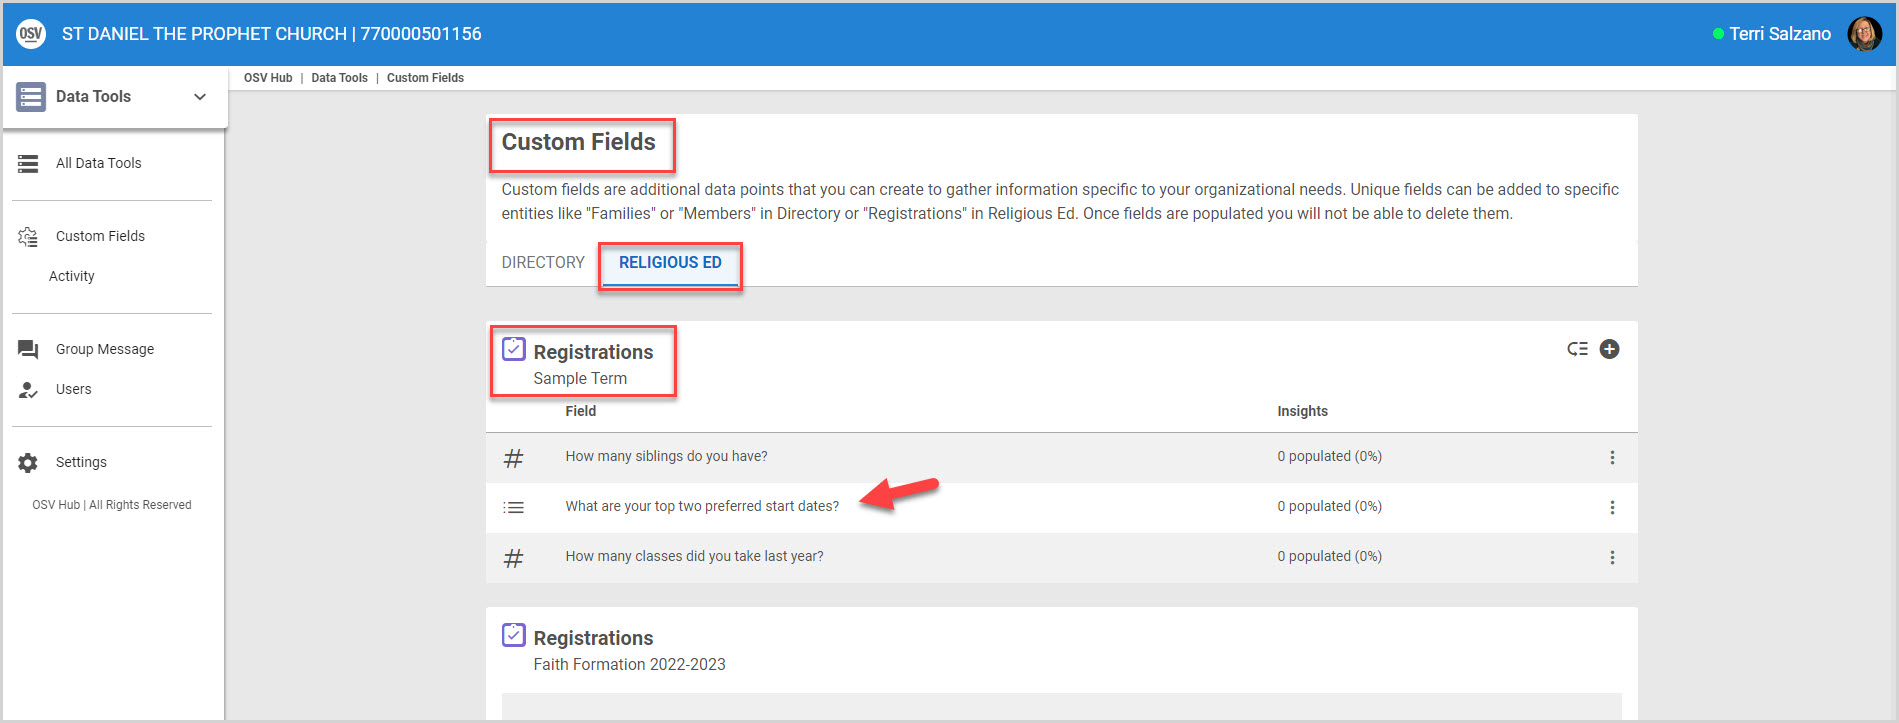
Any custom fields added to the public registration form appear on the form in the same order as they appear on the Custom Fields page. To update the order of custom fields on the public registration form, you can set the order of the Custom Fields by clicking on this icon.


8. Click on the plus sign icon to add another Custom Field.
You can Edit the Custom Field or Set the Order of the Custom Fields. You can also Delete the Custom Field on the Registration card, provided it does not have data populated in the system.
Note* The video is best viewed at full screen. Press Esc on your keyboard when you are finished viewing.
Number
1. Select Number on the New Custom Field card.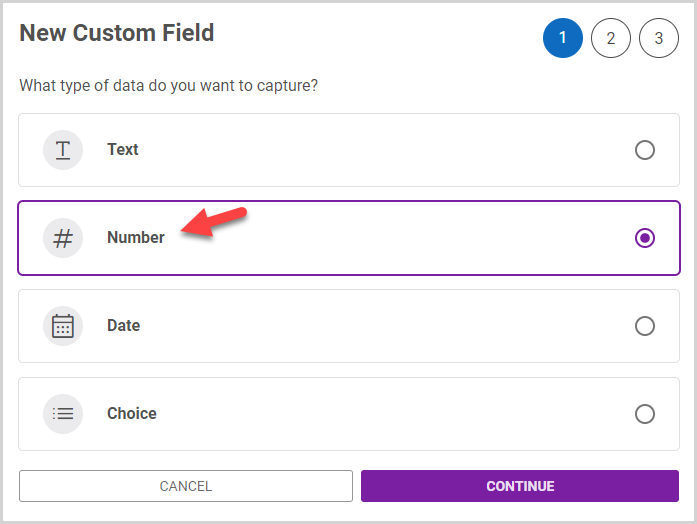
2. Click the Continue button.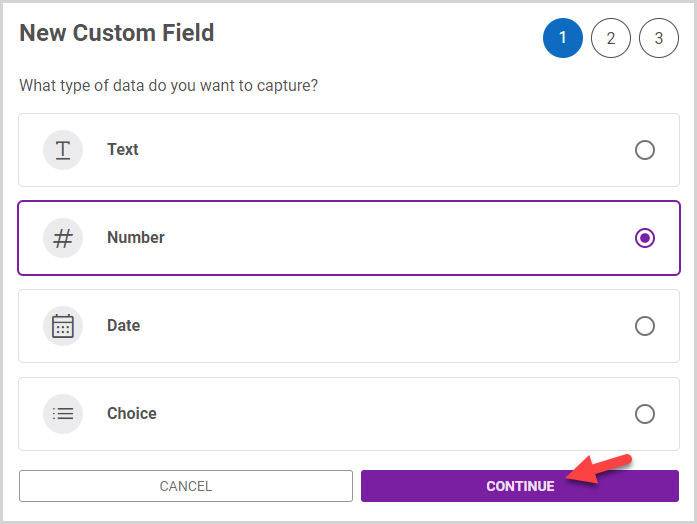
3. Enter a custom label in the number Field Label. This will be the information you wish to capture (e.g., Number of Registrations).
In this example, the custom number field is created in the Religious Education module and associated with registration data for the designated term. This information will be shown on the public Religious Education registration Form for every student being registered for the term.
4. Enter help text. This is optional. If you enter help text, the tooltip containing the information is viewable on the registration form to help guide users when completing the Custom Field.
5. Click Continue.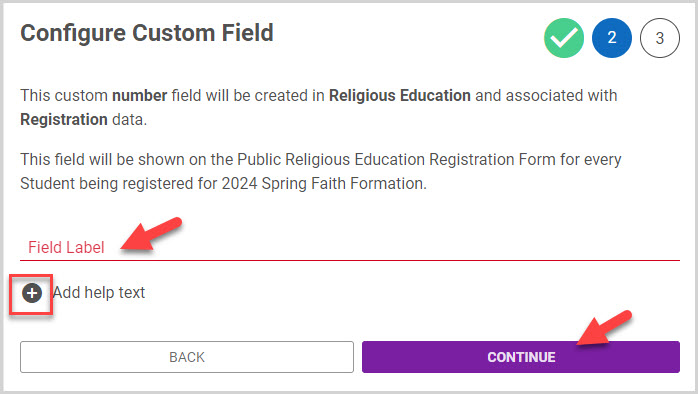
6. Review the configuration to ensure its accuracy. (Do not edit text here. Any text entered while on the preview screen does not save or show up anywhere in the system.)
Note* A tooltip displays if you entered help text. You can hover over the the tooltip to view the text.
Note* Click Cancel to discontinue.
7. Click Finish to create the Custom Field.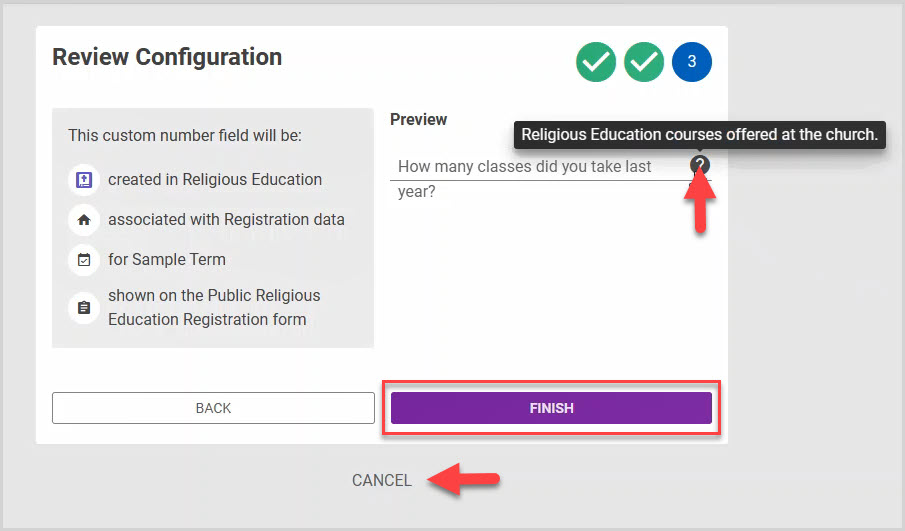
Note* The new Custom Field you create is viewable listed on the specific Registration card on the Custom Fields page within the Custom Fields Religious Education tab. 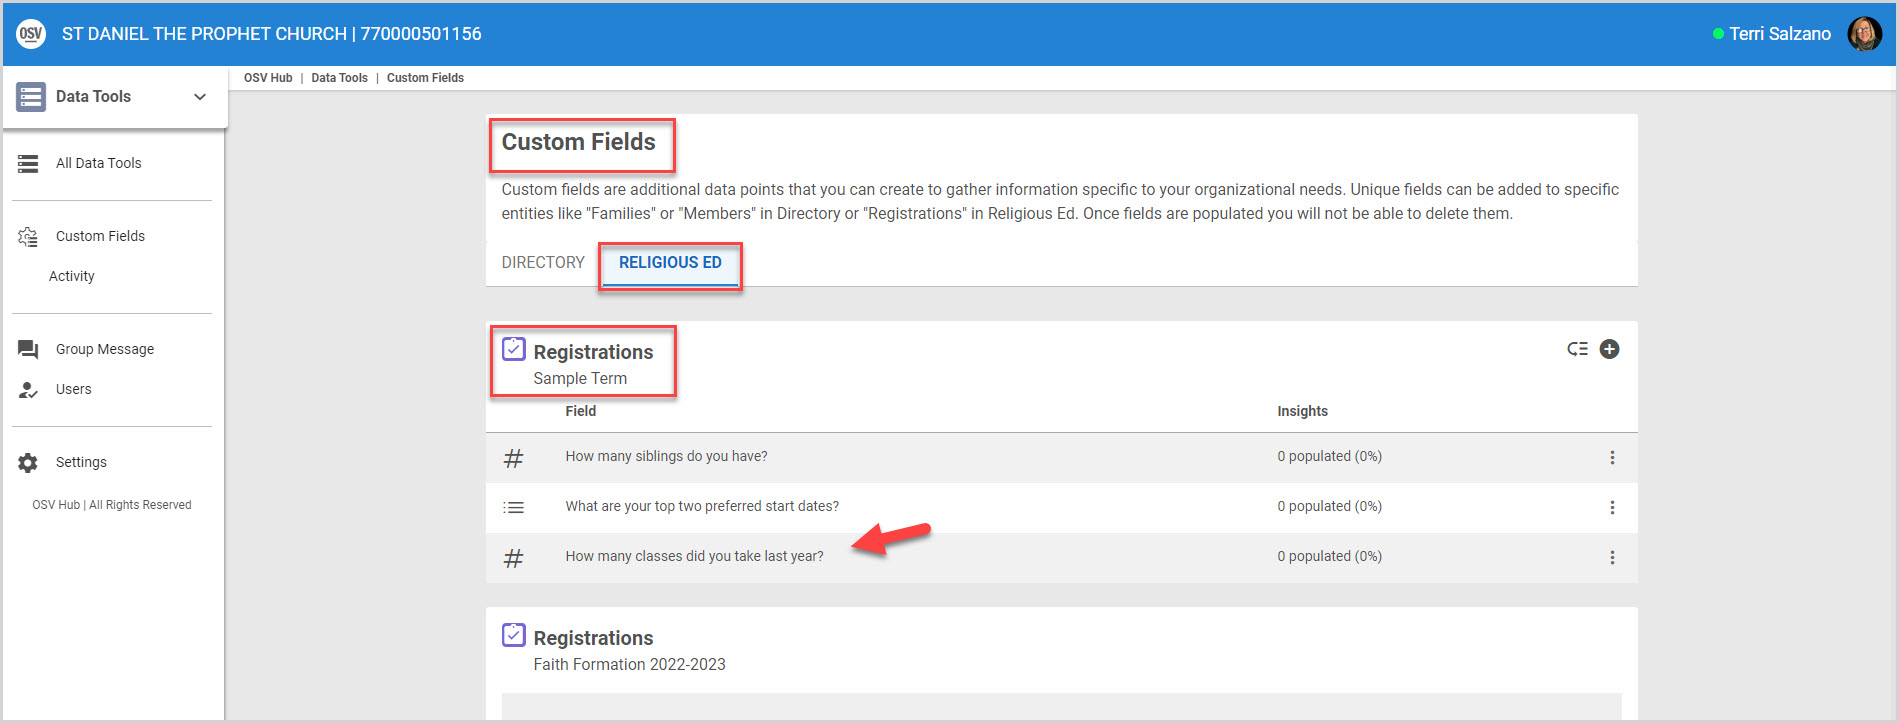
Any custom fields added to the public registration form appear on the form in the same order as they appear on the Custom Fields page. To update the order of Custom Fields on the public registration form, you can set the order of the Custom Fields by clicking on this icon.
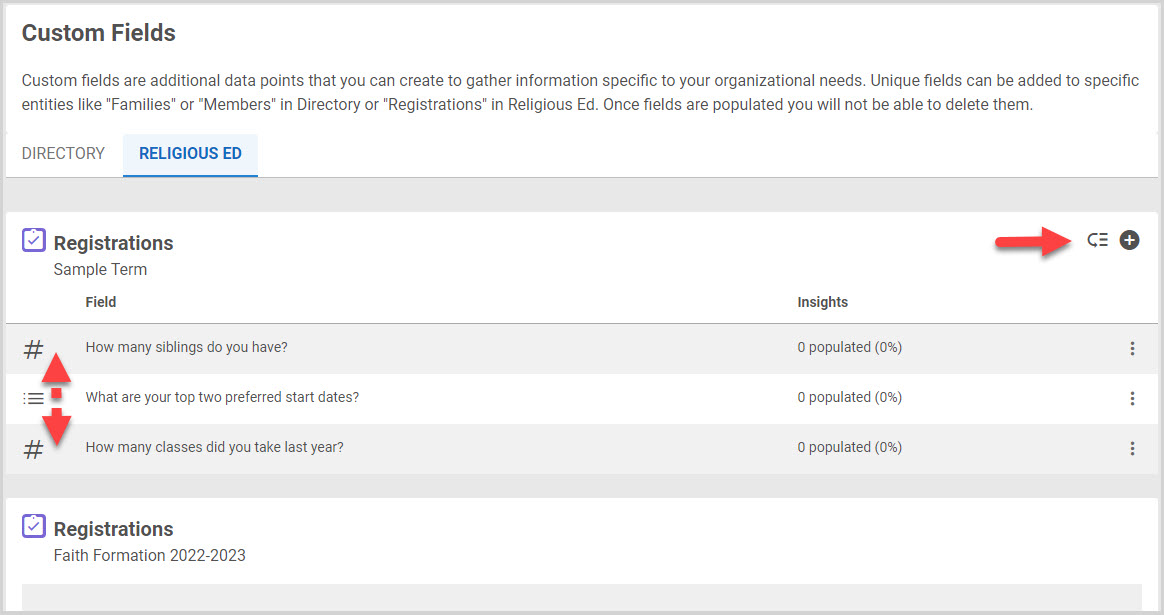
8. Click on the plus sign icon to add another Custom Field.
You can Edit the Custom Field or Set the Order of the Custom Fields. You can also Delete the Custom Field on the Registration card, provided it does not have data populated in the system.
Note* The video is best viewed at full screen. Press Esc on your keyboard when you are finished viewing.
Date
1. Select Date on the New Custom Field card.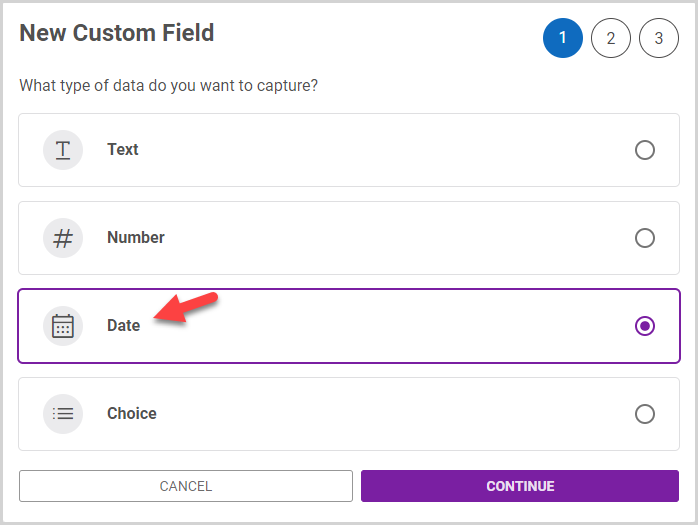
2. Click the Continue button.
3. Enter a custom label in the date Field Label. This text will be the information you wish to capture (e.g., Most Recent Baptism Class Attended).
In this example, the custom date field is created in the Religious Education module and associated with registration data for the designated term. This information will be shown on the public Religious Education registration Form for every student being registered for the term.
4. Enter help text. This is optional. If you enter help text, the tooltip containing the information is viewable on the registration form to help guide users when completing the Custom Field.
5. Click Continue.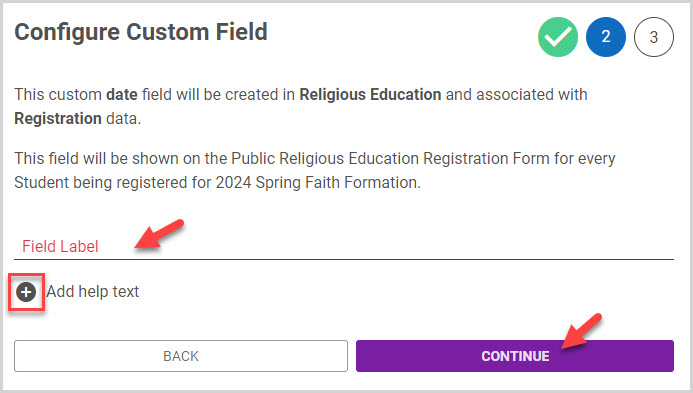
6. Review the configuration to ensure its accuracy. (Do not edit text here. Any text entered while on the preview screen does not save or show up anywhere in the system.)
Note* A tooltip displays if you entered help text. You can hover over the the tooltip to view the text.
Note* Click Cancel to discontinue and confirm by clicking on Yes, Cancel Field.
7. Click Finish to create the Custom Field. 
Note* The new Custom Field you create is viewable listed on the specific Registration card on the Custom Fields page within the Custom Fields Religious Education tab. 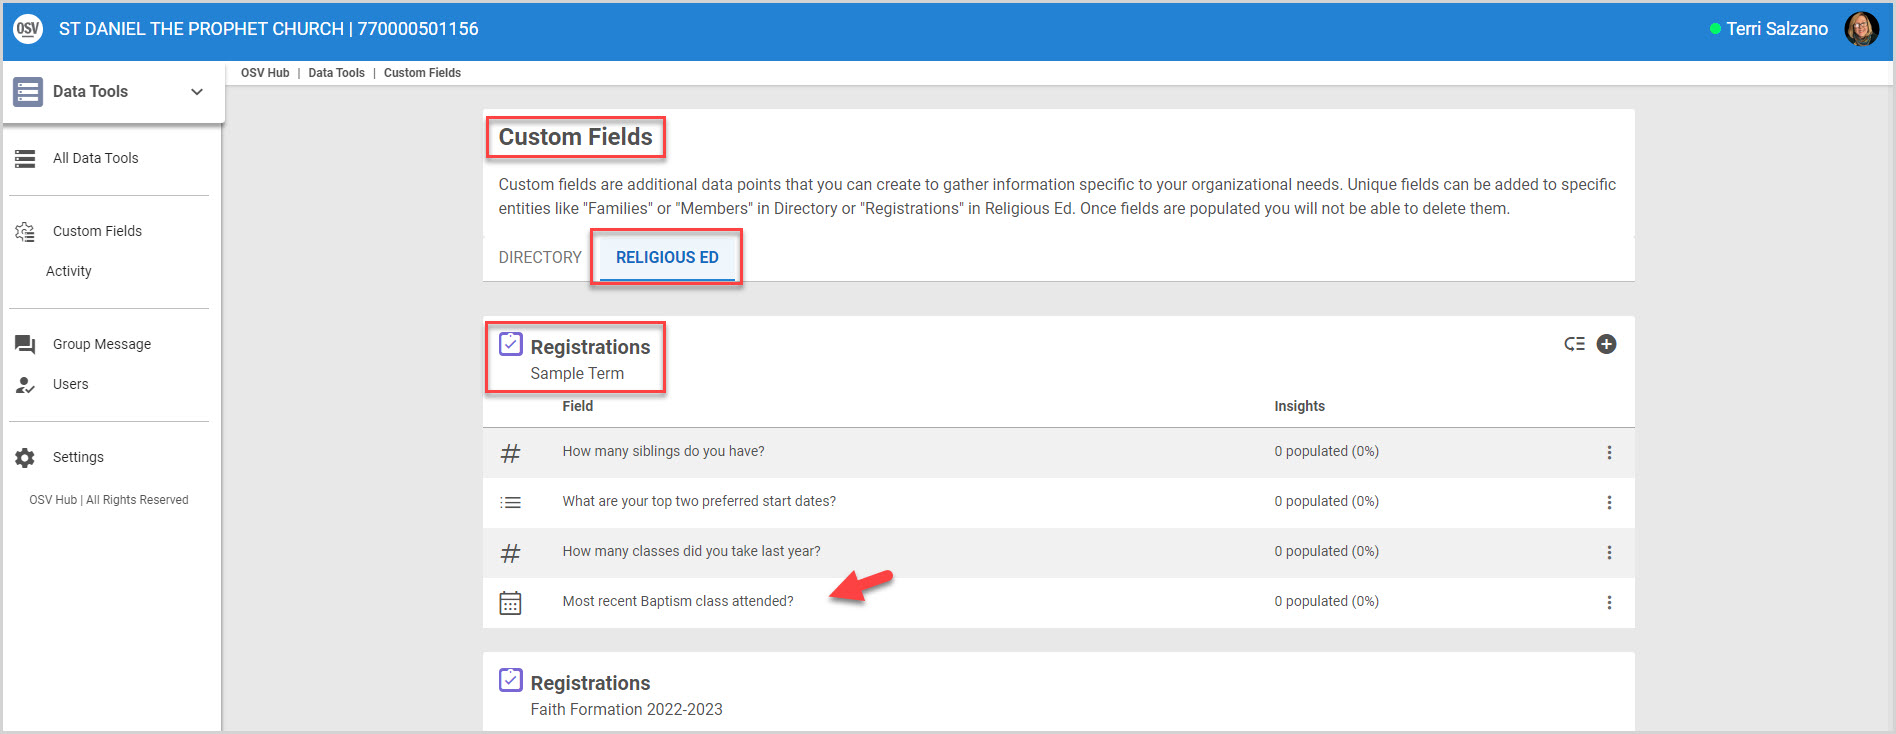
Any custom fields added to the public registration form appear on the form in the same order as they appear on the Custom Fields page. To update the order of Custom Fields on the public registration form, you can Set the Order of the Custom Fields by clicking on this icon.
8. Click on the plus sign icon to add another Custom Field.
You can Edit the Custom Field or Set the Order of the Custom Fields. You can also Delete the Custom Field on the Registration card, provided it does not have data populated in the system.
Note* The video is best viewed at full screen. Press Esc on your keyboard when you are finished viewing.
Choice
1. Select Choice on the New Custom Field card.
2. Click the Continue button.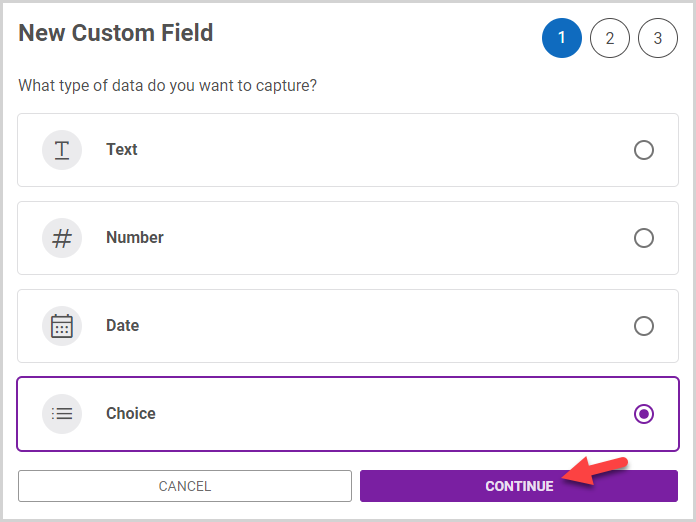
3. Enter a custom label in the choice Field Label. This text is the information you wish to capture (e.g., Communication Preferences).
In this example, the custom choice field is created in the Religious Education module and associated with registration data for the designated term. This information will be shown on the public Religious Education registration Form for every student being registered for the term.
4. Enter help text. This is optional. If you enter help text, the tooltip containing the information is viewable on the registration form to help guide users when completing the Custom Field.
5. Click on the radio button for the Choice Type of answers that you would like to display.
Your choices are:
- Single answer list - users can select only one option from a list presented to them.
- Multiple answer list - users may select one or more options from a list presented to them.
- Single answer dropdown - users can select only one option from a drop-down menu.
- Multiple answer dropdown - users may select one or more options from a drop-down
Note* Users can only select one answer for single answer choice types, but users can select more than one answer for multiple answer choice types.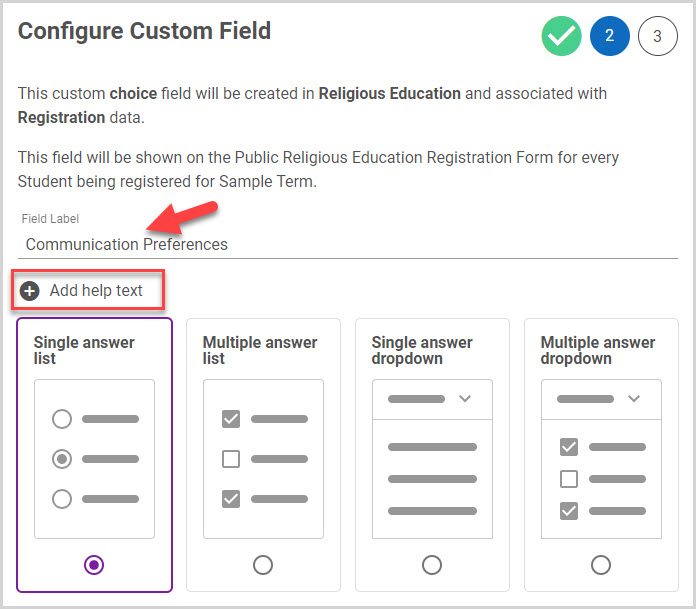
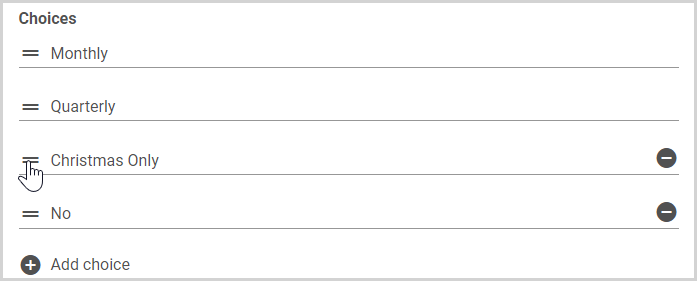
6. Enter the choices you want available for selection. You must enter at least two choices. (There is no limit for the number of choices.)
7. To add more choices, click the Add choice (plus sign) icon.
8. If you would like to offer users the option to add their own custom choice as an answer, select the Let users add their own choice checkbox. Checking the box will automatically provide a selection titled “Other” as a choice. You do not need to add it.

Note* You can rearrange the choices to appear in the order you want. Click and hold the drag handle, and then drag and drop the choices into the order you desire.
Note* Click Cancel to discontinue and confirm by clicking on Yes, Cancel Field.
9. Click Continue to move forward.

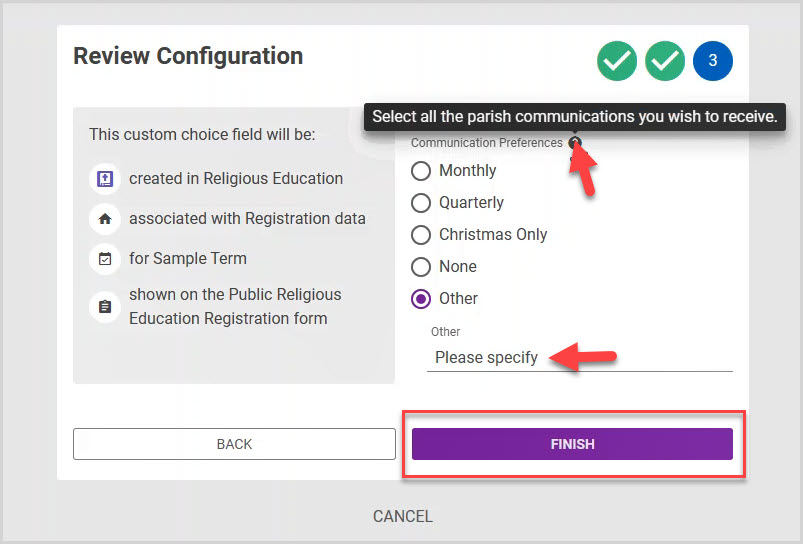
10. Review the configuration to ensure its accuracy. (Do not edit text here. Any text entered while on the preview screen does not save or show up anywhere in the system.)
Note* A tooltip displays if you entered help text. You can hover over the the tooltip to view the text.
Note* If a user selects “Other,” they are provided space to enter their own text.
11. Click Finish to create the Custom Field.
Note* The new Custom Field you create is viewable listed on the specific Registration card on the Custom Fields page within the Custom Fields Religious Education tab.

Any custom fields added to the public registration form appear on the form in the same order as they appear on the Custom Fields page. To update the order of Custom Fields on the public registration form, you can Set the Order of the Custom Fields by clicking on this icon and moving the selections into your preferred order.
12. Click on the plus sign icon to add another Custom Field.
You can Edit the Custom Field or Set the Order of the Custom Fields. You can also Delete the Custom Field on the Registration card, provided it does not have data populated in the system.
Note* The video is best viewed at full screen. Press Esc on your keyboard when you are finished viewing.